Thursday, May 23, 2013

[UDK] Reconstruct Normals from Depth

This is a UDK material to re-construct (view space) normals from scene depth. 


Unfortunately the depth buffer suffers from serious precision errors in DX9 mode which limits the use of this technique quite a lot. For post process effects like SSAO or SSGI it might be best practice to combine 'depth only' approaches with 'normals from depth'.

DX9:

DX11:


A blur pass after reconstructing the normals helps to reduce artifacts but also lowers the precision, espacially for fine details and across object edges.


Saturday, May 11, 2013

Normal Maps: Replacing The Blue Channel (UDK/UE3)

The idea of discarding the blue channel of a normal map to get some free texture space is not new by any means. However, every now and then threads appear where people seem to struggle to get the result look like they want it to be. There are also some tutorials giving misleading informations.


What for?

The main reason to abuse the normalmap blue channel is that you get a greyscale map for free (in terms of memory), e.g. specular/height/emissive/variation etc. This will cut down the memory footprint or/and amount of texture lookups, depending on your setup, preferences, workflow.
A special technique where an extra texture channel is very beneficial is gradient mapping as described here: http://artisaverb.info/DitchingDiffuse.html


Texture and Material Setup

First of all create a tangent space normal map as usual (make sure it is normalized). Then replace the blue channel with a greyscale map of your choice and save the texture.
On UDK import make sure to set the compression to TC_Default. This will ensure a good quality for the blue channel (TC_Normalmap is radical on this part).
After importing the texture you need to uncheck "SRGB" in the texture properties (keep this in mind for the texture creation of the blue channel map).
Besides it is necessary to transfer the normal map from [0,1] to [-1,1] range. This can be done by changing the "Unpack Min" values for the red and green channel from 0 to -1. This setting does not have an instant effect, but can be triggered by applying changes to the material in which the texture is being sampled.


The material setup is pretty simple. Add a component mask node to mask off the blue channel and plug this into a DeriveNormalZ node to reconstruct the missing normal map channel.
Use the blue channel for whatever it is intented to. In my example it holds and ambient occlusion/cavity map which simply gets multiplied by the diffuse map.


Old UE3 builds might neither offer the unpack max/min options nor the DeriveNormalZ node. For those you can to do the [0,1] -> [-1,1] conversion (x*2-1) as well as the z component derivation (z=sqrt(1-(x²+y²)) manually in the material:


Wednesday, May 8, 2013

UDK Custom Lighting Model Materials (diffuse/specular reflectance)


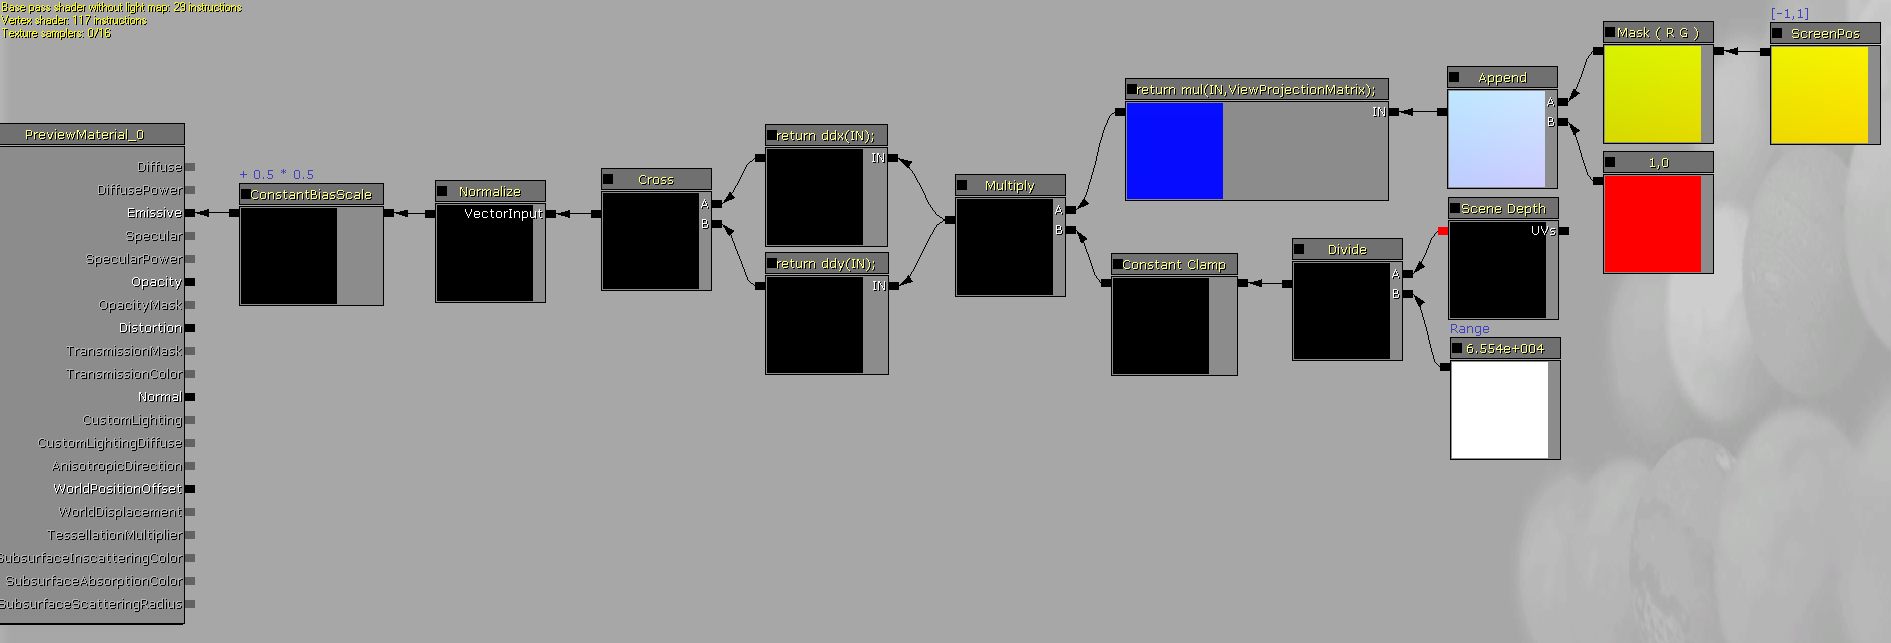
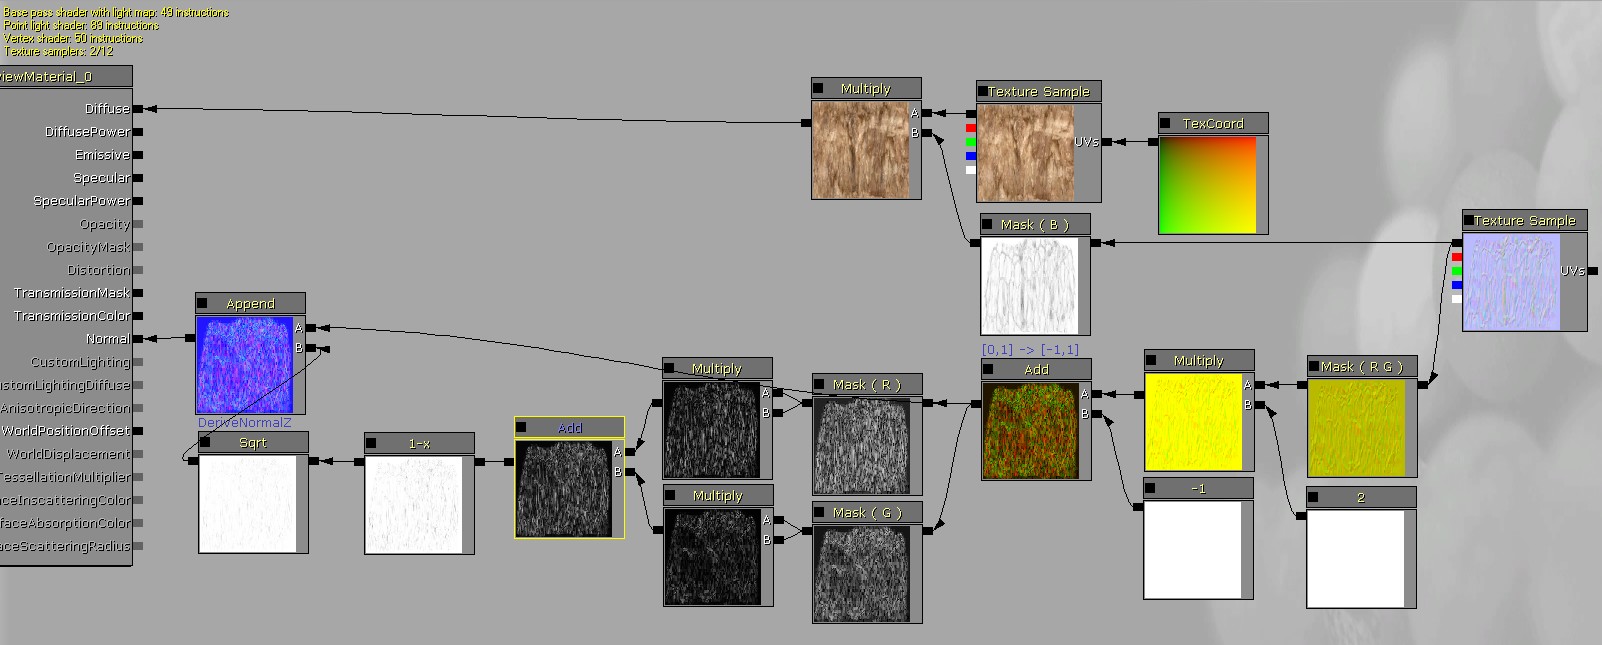
This is a collection of diffuse and specular reflectance models rebuilt in the material editor. To keep things easy to follow I'm using default material nodes if possible. There are just a few custom HLSL nodes for those functions that would not be available otherwise, or more expensive.
Please note that I did use constant vectors instead of texture samplers.

Download samples: http://www.mediafire.com/?ppk2vobz5x3u58b


I won't go into the basics of custom lighting materials or BDRF's (bidirectional reflectance distribution function), so this is worth a read:
http://udn.epicgames.com/Three/CustomLighting.html
http://en.wikipedia.org/wiki/Bidirectional_reflectance_distribution_function


As a reference, here's UDKs default Phong lighting rebuilt as a custom material. Despite its name Phong does only refer to the specular reflectance which is added to the Lambert diffuse term. This same combination of diffuse and specular components (simple add) does apply to the majority of BDRF models.
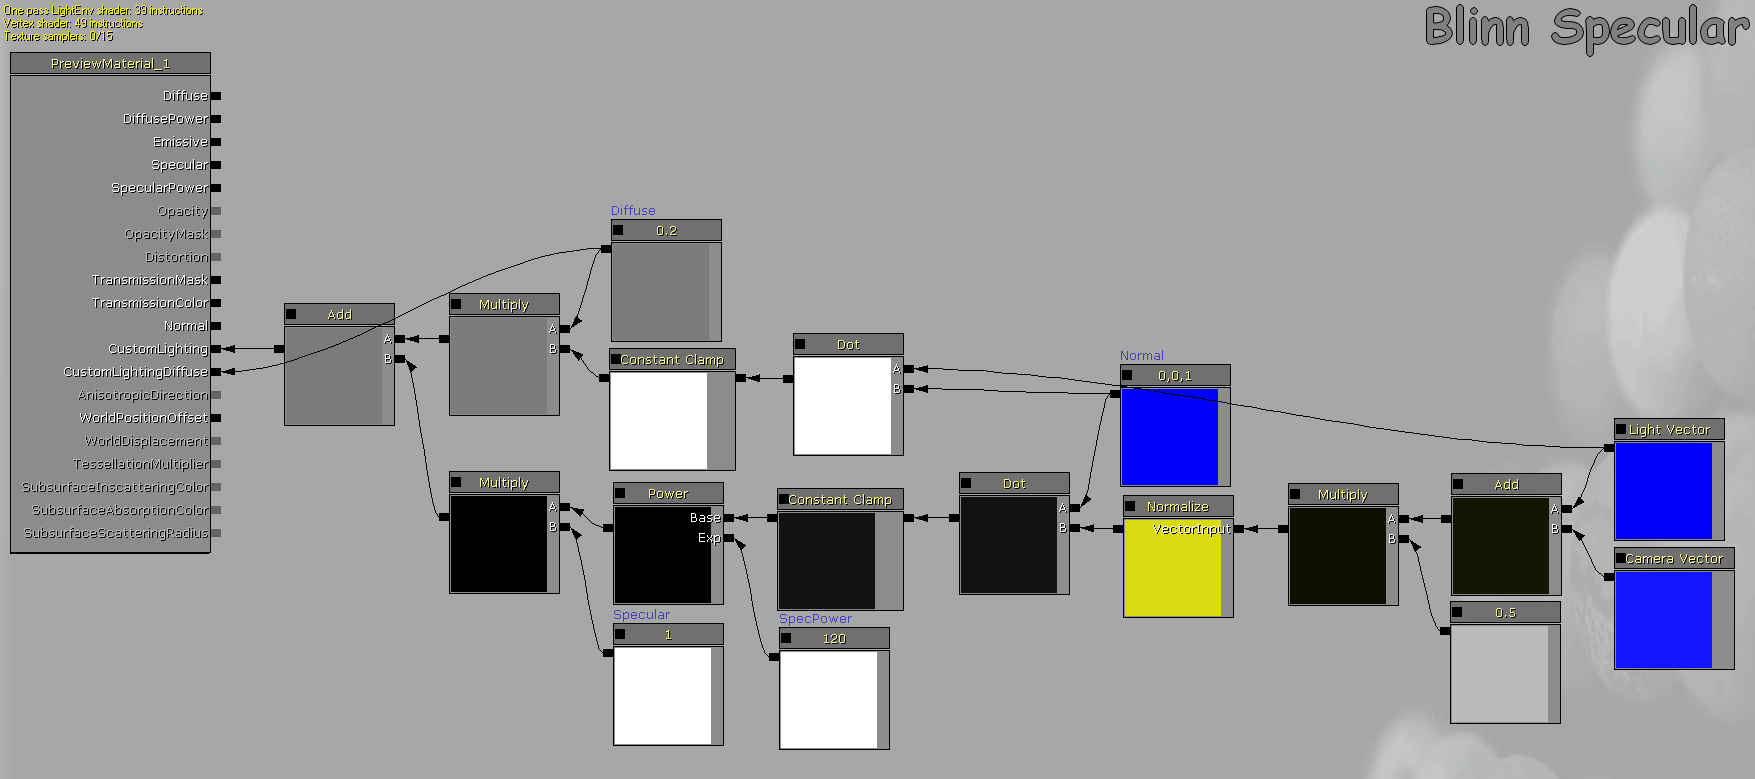


Blinn Specular
- easy to compute
- elongated specular highlights
- useful for oceans, wet streets


Schlick Specular
- easy to compute
- uses no specular power but a specular multipler
- uniform, less shiny specular highlights


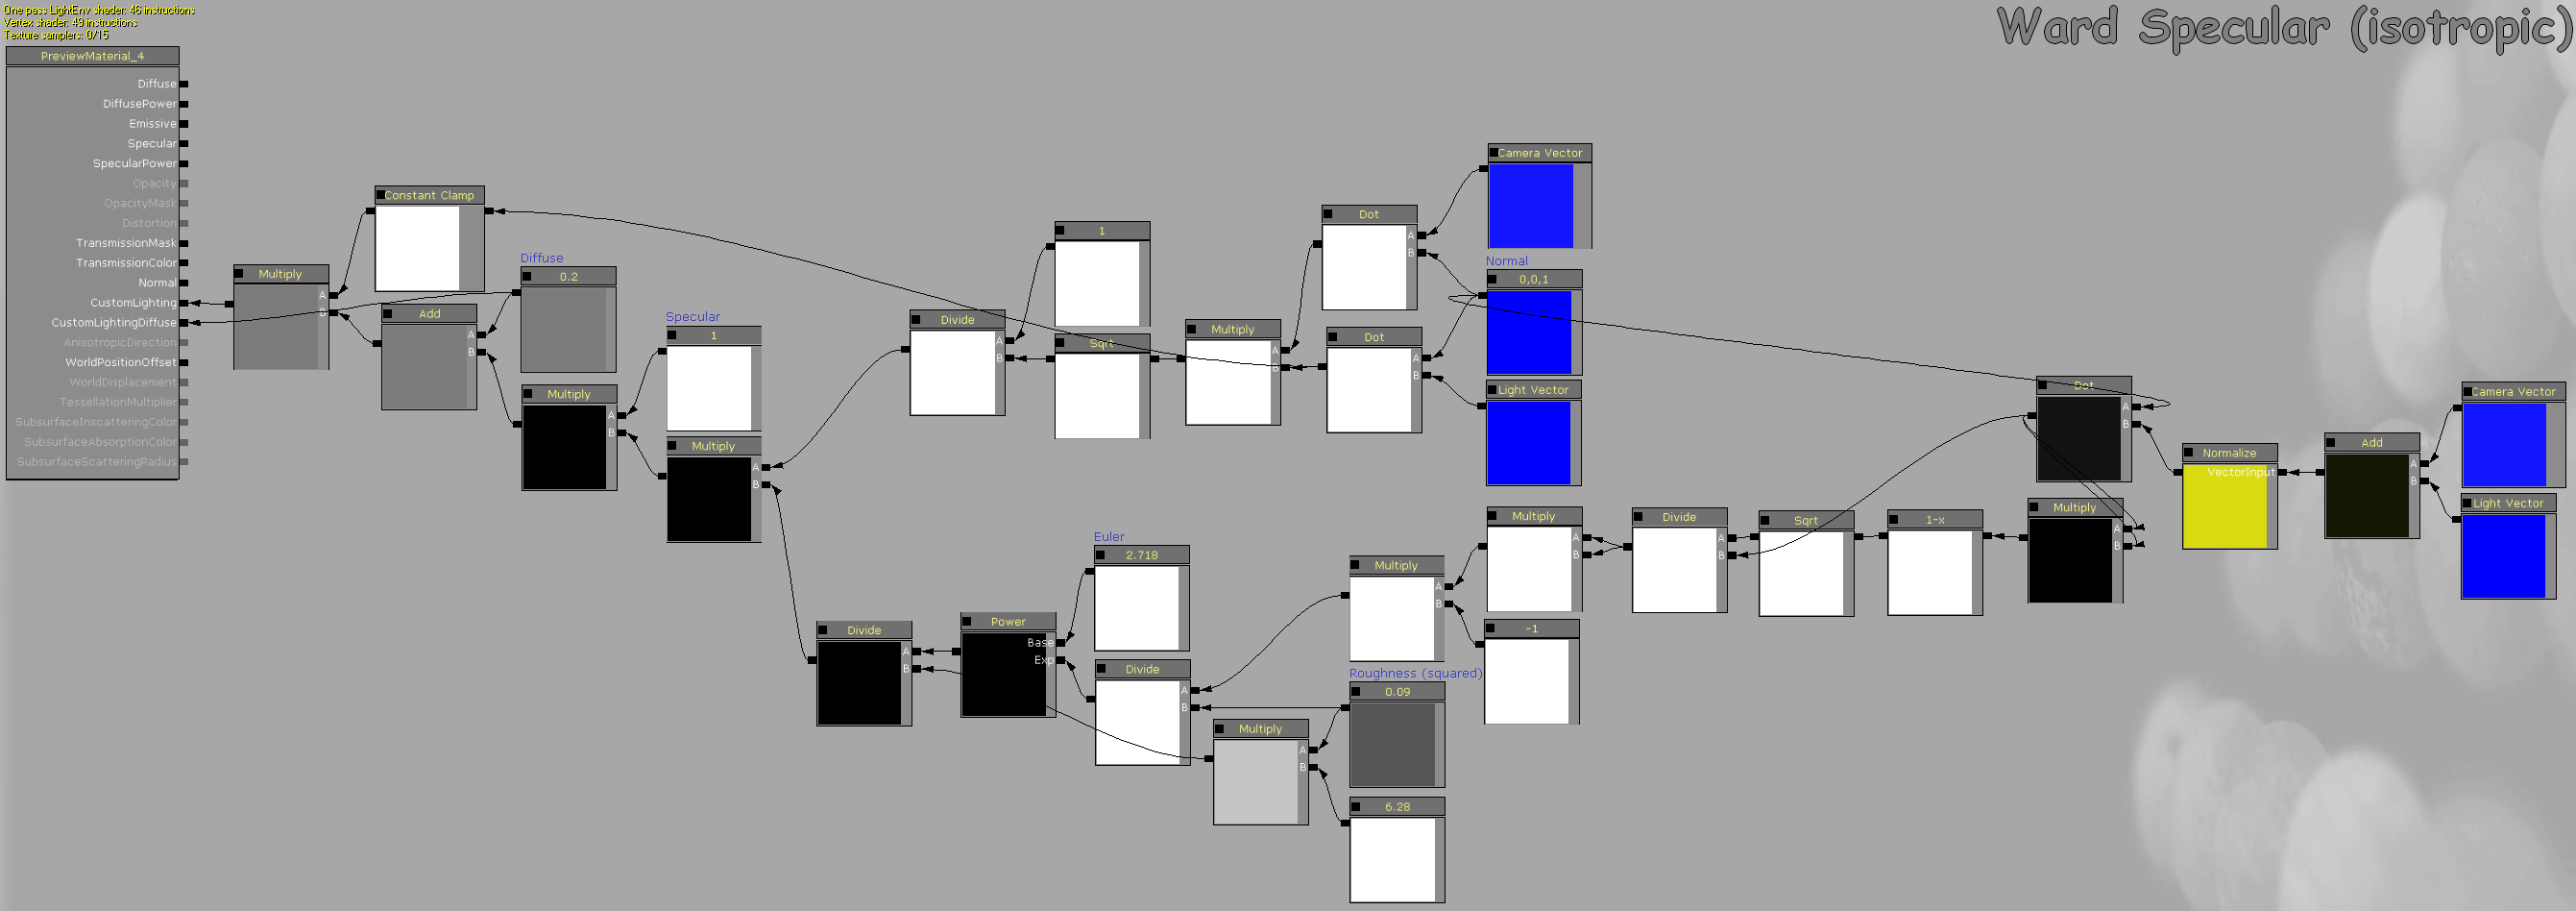
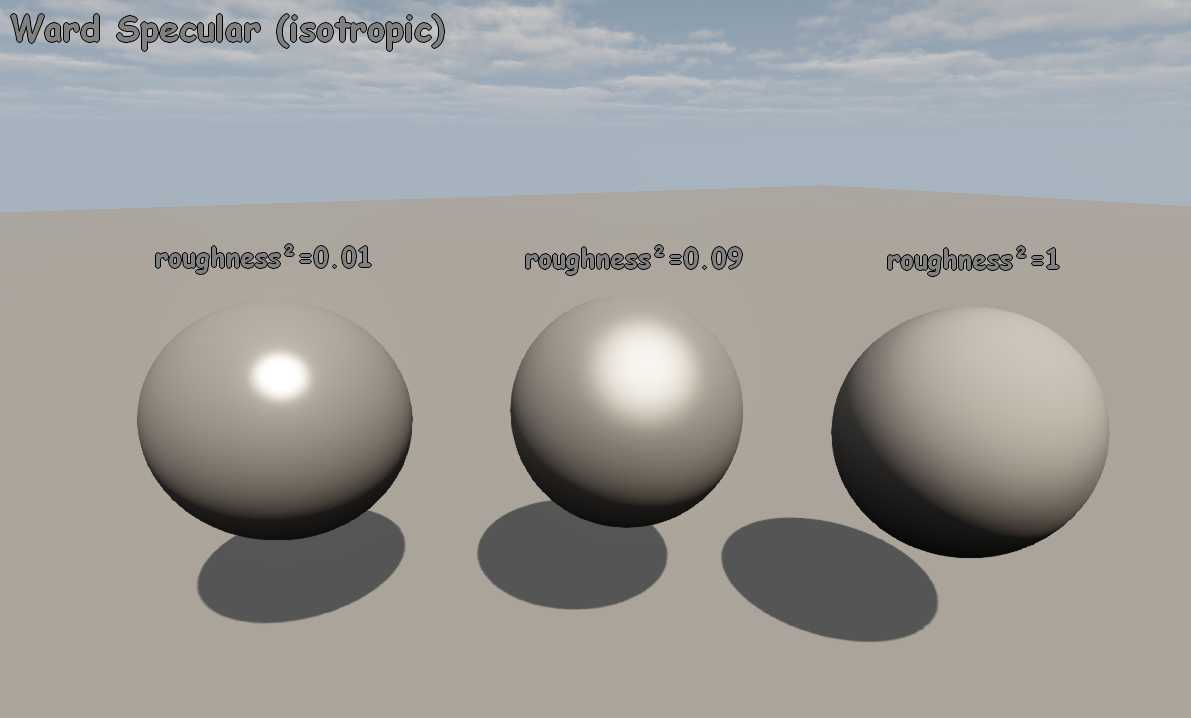
Ward Specular (isotropic)
- slightly advanced model
- more physically accurate than phong
- specular highlight is controled by a roughness parameter (0.00001 - 1 range)
- low roughness results in small and strong specular highlights


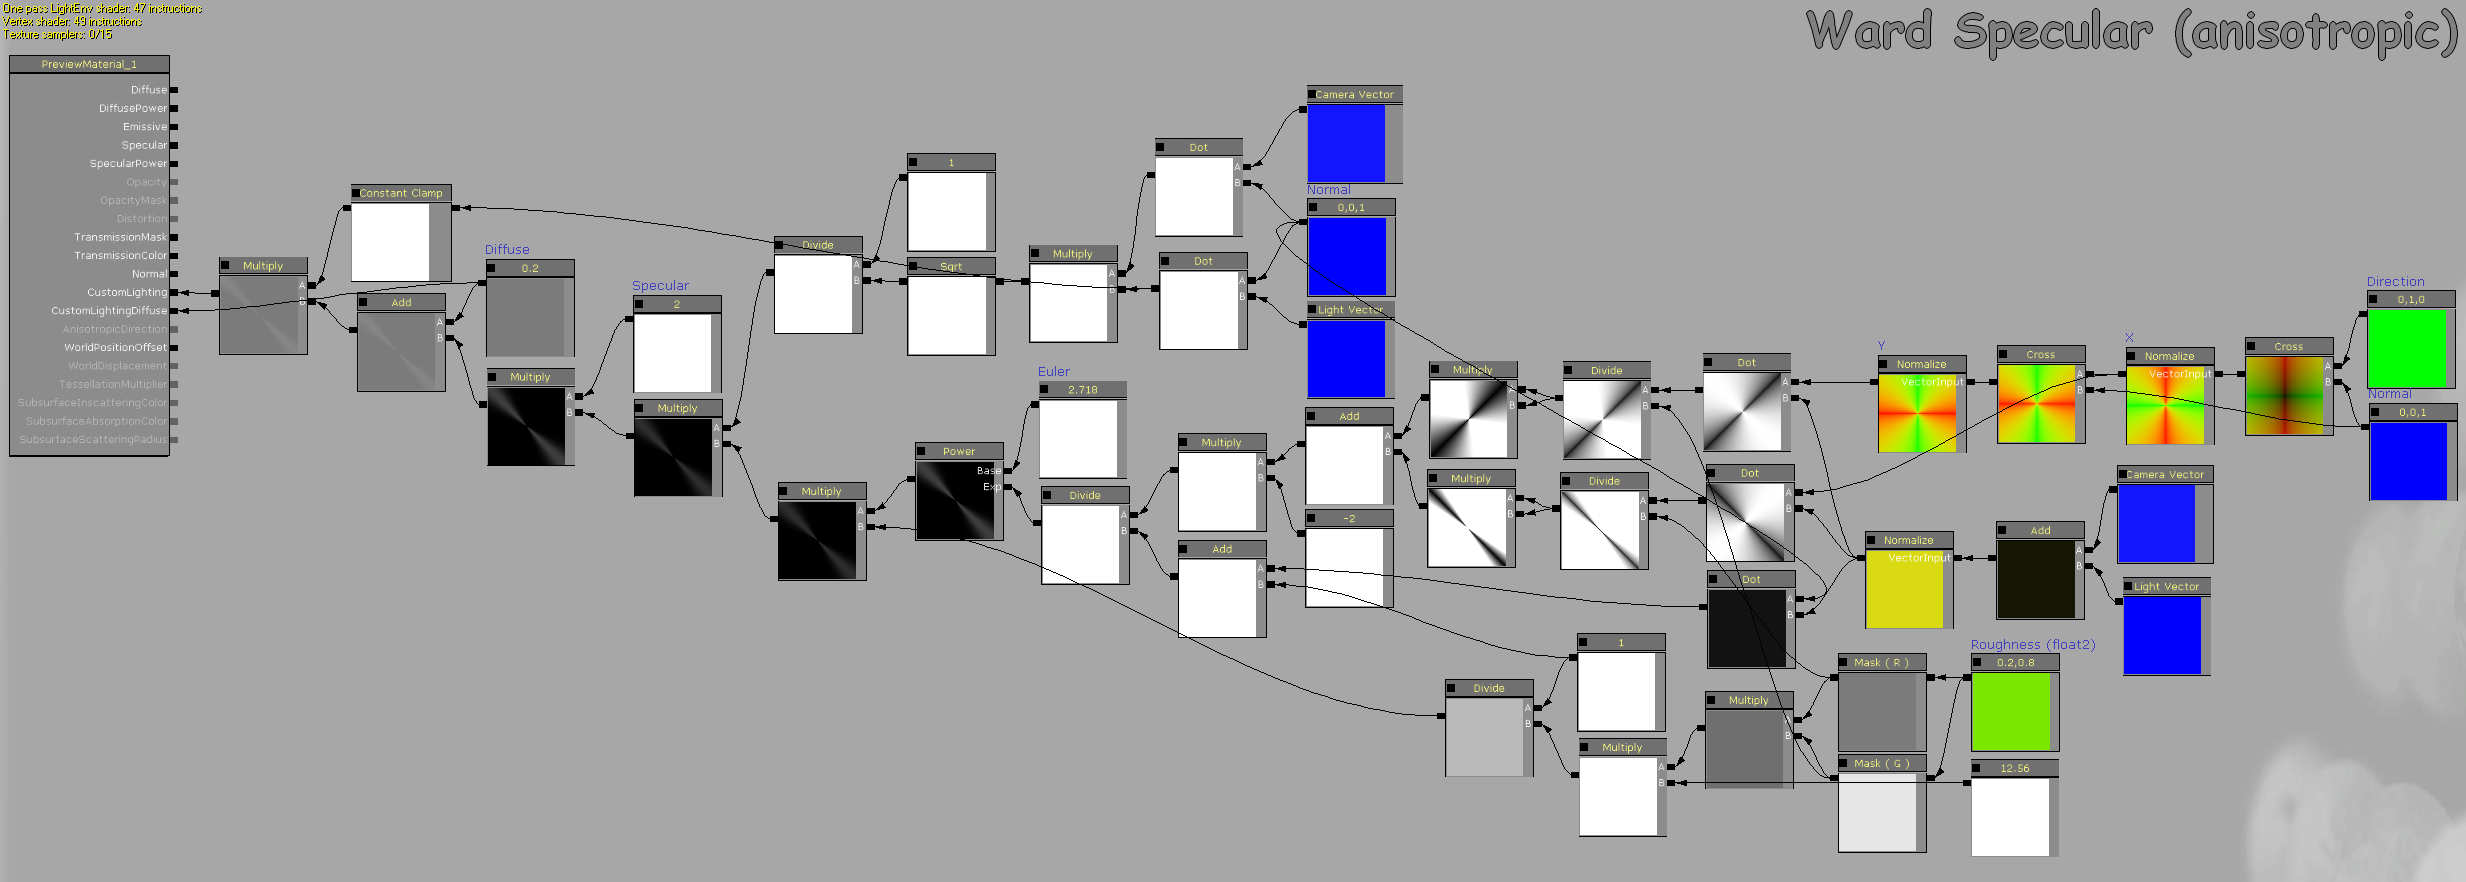
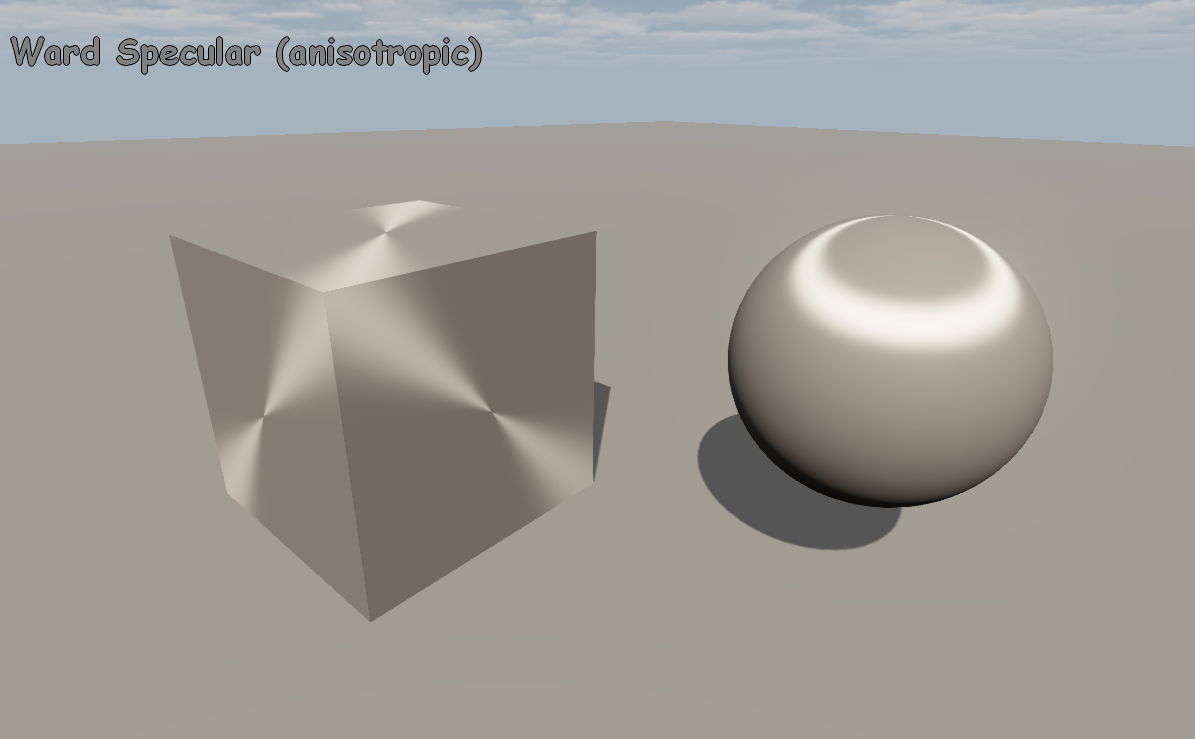
Ward Specular (anisotropic)
- anisotropic version of the simple ward model
- required for specific things like hair rendering or brushed metal
- handles anisotropic direction maps
- roughness parameter is a constant2vector,
makes it possible to control the specular highlights x and y dimensions independantly


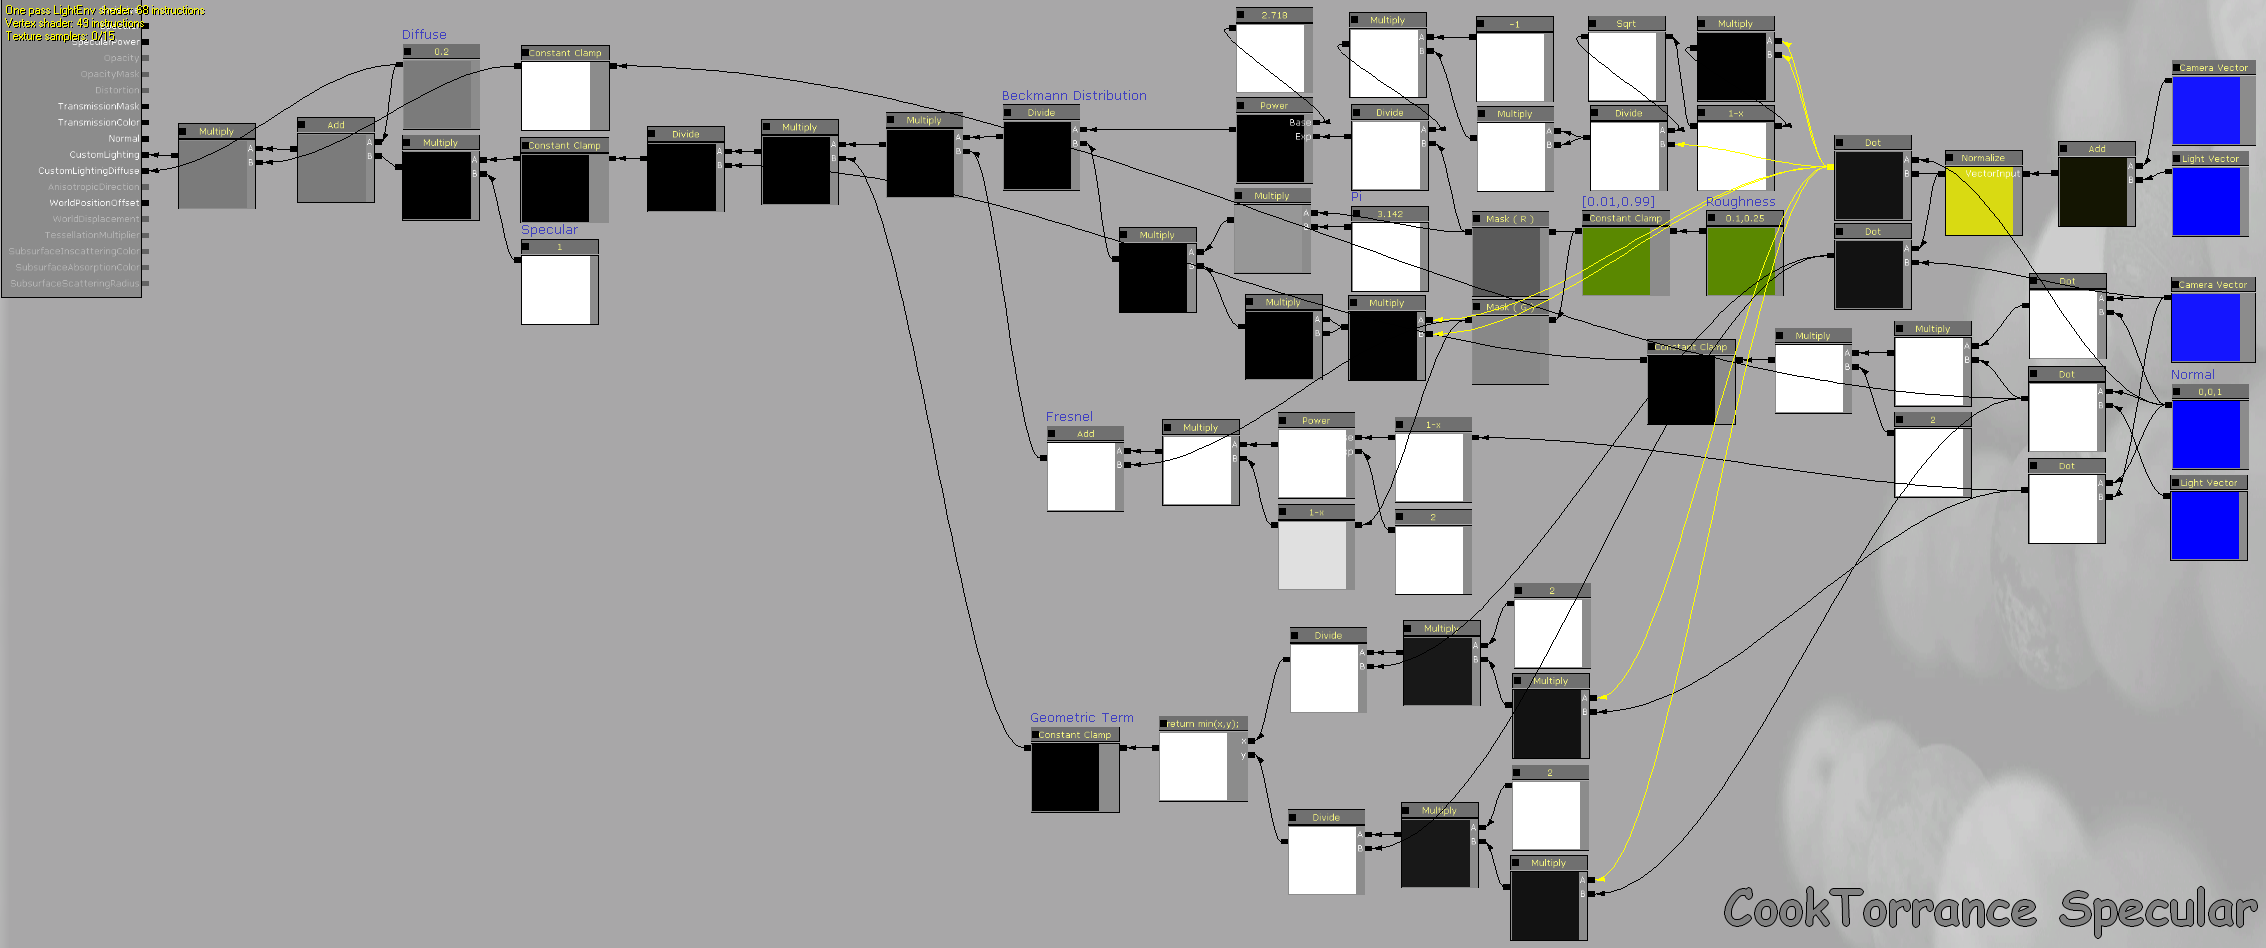
Cook-Torrance Specular
- advanced model
- designed for metal surfaces
- comprises a fresnel term,
which is controled by the y component of the roughness parameter
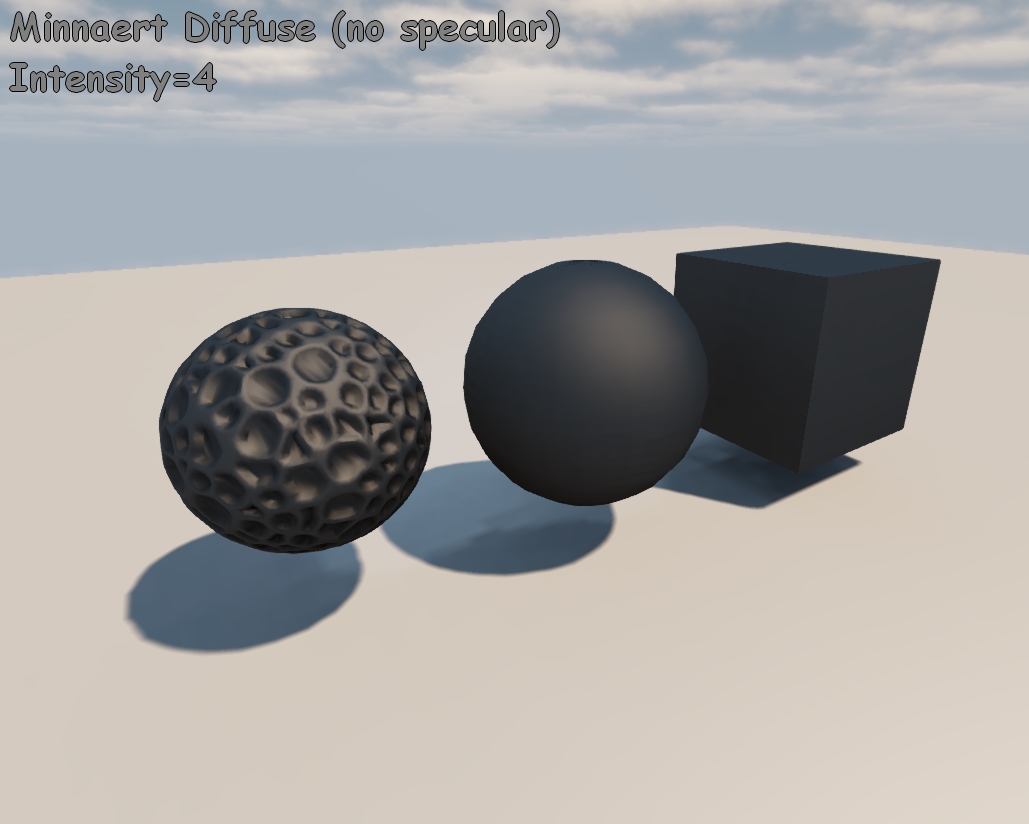


Minnaert Diffuse
- easy to compute
- best suited for velvet materials
- view dependant diffuse highlight
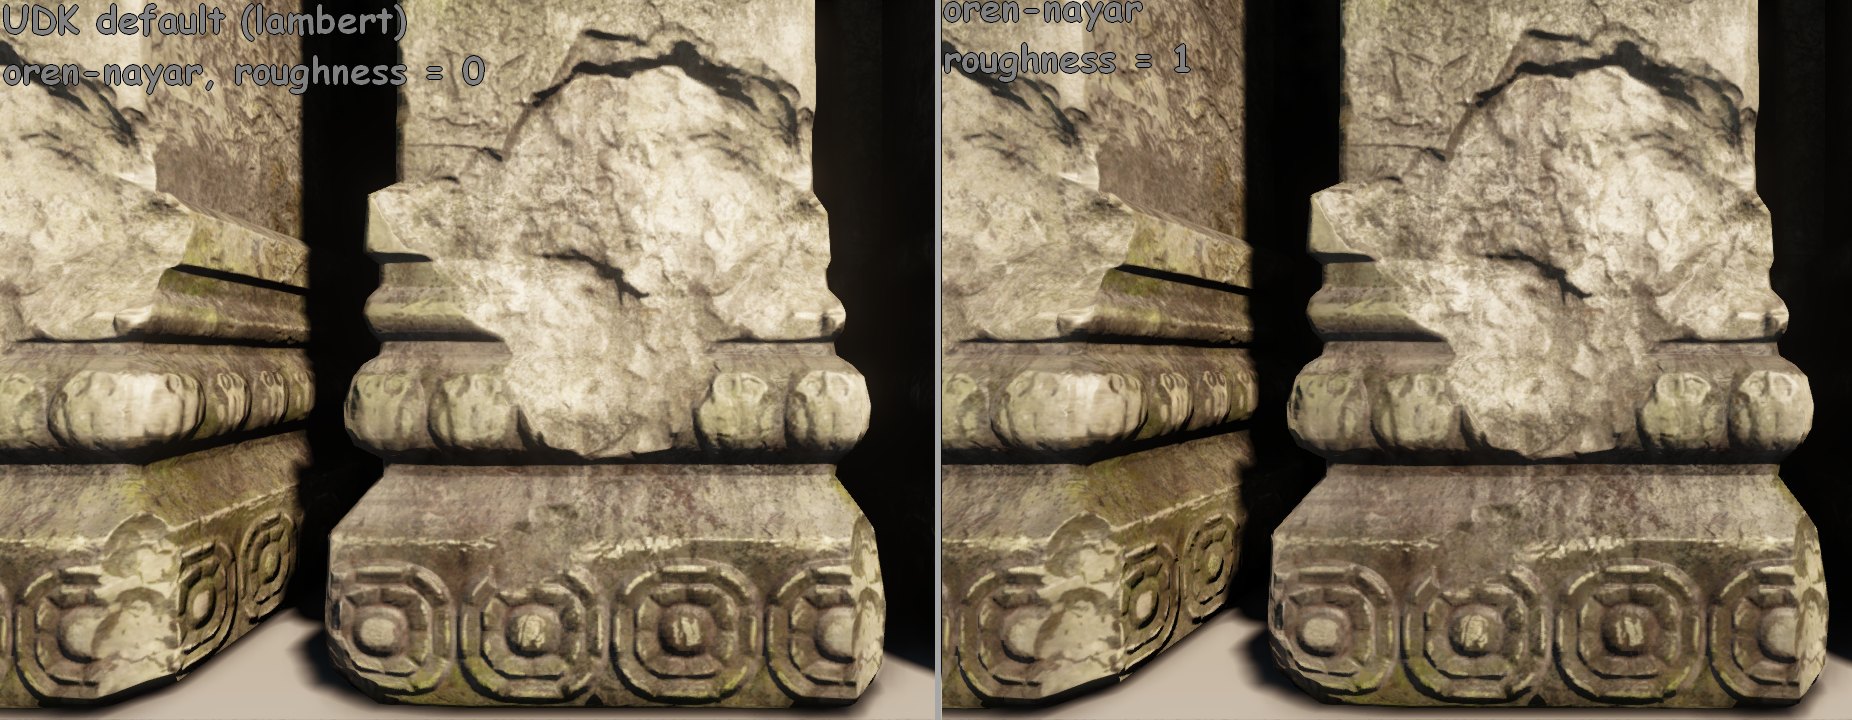


Oren-Nayar Diffuse
- advanced model
- designed for rough surfaces
- handels inter-reflections
- roughness=0 equals to default lambert diffuse
- does not require a custom material